- Published on
- • Alteryx • 0 views
How to Use the Alteryx Gallery API to Embed Apps & Workflows
The Alteryx Gallery is a great environment to distribute and productionise your Alteryx work. Users can login in and generate files and reports based on workflows created by Alteryx Designer users. While this works for a lot of users, there is also a growing demand for embedding this functionality in custom build websites or third party company portals. In this blog post, I will walk you through setting up an environment in which you can embed apps and workflows and how to run them. You will find code snippets that should help you understand how to use the Gallery API endpoints.
If you want to get stuck in immediately then head over to the corresponding Github page to get the source code and files from the embed_workflow folder. Scroll to the bottom of this page to see an example for analytic apps. That code is slightly different because you need to grab the app questions with the API. You can also find the code for this on the same Github page in the embed_app folder.
A good use case I have seen at a customer was embedding analytic apps in SharePoint. A team-collaboration platform built by Microsoft where you can display an interface to end users so they can run their own reports. This blog will, however, not deal with specific portals such as SharePoint, but I'll focus on creating a very basic single-page website in which you can run a workflow and generate an output. Big thanks to Craig Bloodworth for helping me out and for letting me blog about it.
Be aware that there is going to be some code in this blog post and that for using the Gallery API you need some basic knowledge of JavaScript.
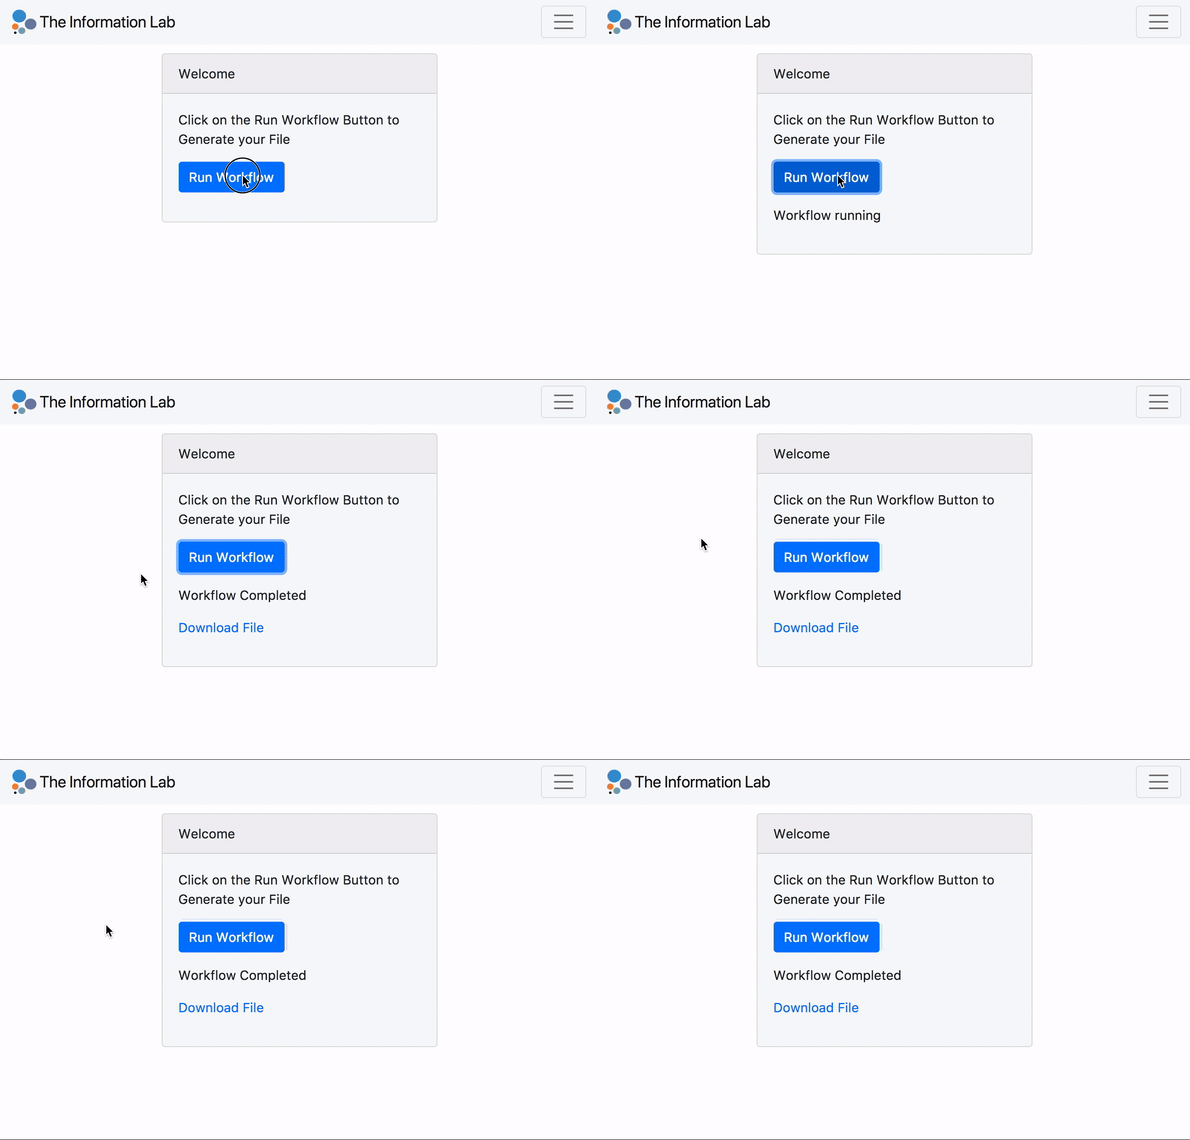
What we are going to create is this basic single webpage for running a published workflow:

Let's get started. The prerequisites for using the Gallery REST API are:
- An Alteryx Server with a gallery. You need to have a gallery to utilise the API. You can't use it when you only make use of the scheduler functionality of server.
- A Private Studio (Subscription) in which you publish the workflows that you want to run. All workflows and apps need to be saved into the same private studio. It's important to note that, unlike with the Gallery, you can't log and trace which user ran a workflow or analytic app when you use the API.
- The Gallery URL, Gallery Key and Gallery Secret. You need these to connect to the REST API. You can obtain them by going to Settings - Keys - Private Studio API (in your own gallery). If you want to read more about this then go to the API documentation, which can be found here. This is an interactive page where you can interact with your own server (you can find it on your server by going to 'Looking for More' at the bottom of your Gallery page).
I went ahead and created a page with just one bootstrap card for a very basic workflow (index.html). It has one button, to run the workflow and it will generate an output file. This output file will be downloadable after running the workflow.
Setting up the Gallery
Once you have grabbed your keys and URL you can setup the gallery connection. By now you should also have created a blank JS file. If you have downloaded my source code then this file is called app.js. Place your keys and URL in the provided lines. You also need the alteryxGalleryAPI.js and the oath-signature.js files. These two are also on the Github page.
- Workflow ID: a unique ID of the workflow published to the gallery
- Job ID: a unique ID of a job that kicks off when you run the workflow
- Output ID: a unique ID of the output when the workflow has successfully finished running
You can find the first through the interactive API documentation or making a request to the gallery. Make sure that if you make changes to a workflow that is already saved on the gallery you overwrite this workflow. This means that the workflow ID stays the same. Every workflow has its own ID, which means that if you make changes and then upload a new version this version will have a new workflow ID.
After getting the workflow ID we define our functions to get the workflow status, for running the workflow and finding the job ID status.
The last part of the app.js file is to load the code into the page when the DOM is ready. We then have an onClick event on the 'Run Workflow' button to initiate the workflow. In this example I'm using promises to get around JavaScript's asynchronous nature. There is also error handling when there is an issue with running the workflow.
More examples
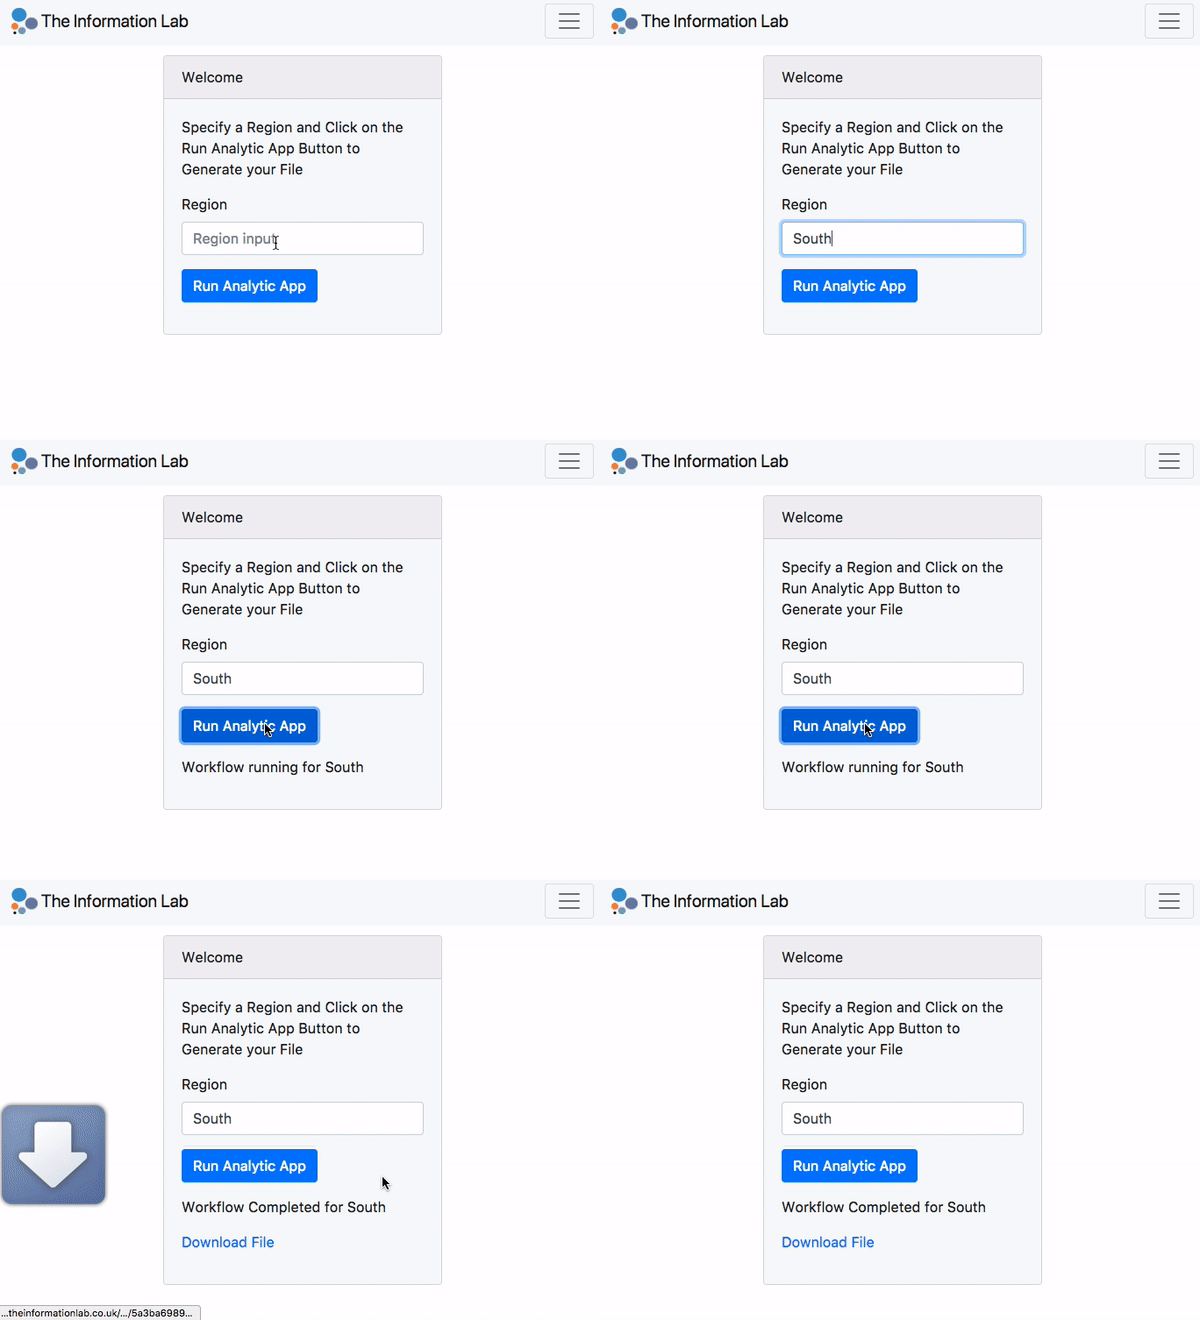
I have created another example for running analytic apps. You can find it on the same Github page. Those code snippets pick up the analytic app questions so you can run the process outside the gallery. In the future I will add more, including how to upload files and how to create a map input in your third party solution.
